HOWTO.md 13 KB
EL1000
EL1000 is a collection of corpora that include annotations derived from daylong recordings of children, both automatically or manually, as well as metadata about the recordings and the children. The recocrdings themselves are usually not provided.
There are at most two access tiers for each corpus, which allows flexibility in which data can be shared with whom: the main tier, and the "confidential" tier, which is restricted to a narrower audience.
Most corpora are entirely made of LENA recordings. In the instructions below, we will assume that this is your case, and that you possess the ITS annotations for all of the recordings. Some of the corpora include annotations extracted using ALICE, the VTC, or the VCM. Some of them include manual annotations. We will also cover these cases. We will also assume the the audio will not be published.
Creating the dataset
The first step is to create the dataset on GIN, in the EL1000 organization.
Creating GIN datasets
Step 1 is to create empty datasets on GIN, where the data will be hosted.
Using the browser capabilities on GIN, create two empty repositories in your GIN organization: <dataset-name> and <dataset-name>-confidential, e.g. dataset1 and dataset1-confidential. Here's an example of creation of the first (i.e. non confidential); notice that (a) you need to create the repo from the organization (and not your personal account) and (b) you need to uncheck the box at the bottom during actual creation.
You may not need a 'confidential' version of the dataset. In this case, you can just create the first dataset.


Setting up SSH access to GIN
Step 2 is to make sure that you have configured your SSH access to GIN. The procedure is described here.
Create and configure the dataset
Step 3 is to create the dataset locally with DataLad on your own computer, linking it to the empty GIN datasets that you just created. EL1000 datasets have to be structured and configured in a standardized way. Fortunately, you do not have to do this by hand.
We provide a DataLad procedure to create new EL1000 datasets. In order to use it, you need to install the procedure by following the instructions here: Installing our datalad procedures.
Once the installation is complete, run the following script (edit the environment variables to suit your configuration):
export GIN_ORGANIZATION='EL1000' # name of your GIN organization
export CONFIDENTIAL_DATASET=1 # set to 1 if there should be a confidential sibling, 0 otherwise
datalad create -c el1000 dataset-name
For instance, in the example above, we'd do the following, because this is a dataset that has some confidential content:
export GIN_ORGANIZATION='EL1000' # name of your GIN organization
export CONFIDENTIAL_DATASET=1 # set to 1 if there should be a confidential sibling
datalad create -c el1000 rague
And here is an example of a dataset that has some no content:
export GIN_ORGANIZATION='EL1000' # name of your GIN organization
export CONFIDENTIAL_DATASET=0 # set to 1 if there should be a confidential sibling
datalad create -c el1000 lyon
The output you'll see looks like this:
> [INFO   ] Creating a new annex repo at /Users/acristia/Documents/git-data/rague
[INFO   ] Scanning for unlocked files (this may take some time)
[INFO   ] Running procedure cfg_el1000
[INFO   ] == Command start (output follows) =====
[INFO   ] Could not enable annex remote origin. This is expected if origin is a pure Git remote, or happens if it is not accessible.
[WARNING] Could not detect whether origin carries an annex. If origin is a pure Git remote, this is expected.
.: origin(-) [git@gin.g-node.org:/EL1000/rague.git (git)]
.: origin(+) [git@gin.g-node.org:/EL1000/rague.git (git)]
[INFO   ] Could not enable annex remote confidential. This is expected if confidential is a pure Git remote, or happens if it is not accessible.
[WARNING] Could not detect whether confidential carries an annex. If confidential is a pure Git remote, this is expected.
.: confidential(-) [git@gin.g-node.org:/EL1000/rague-confidential.git (git)]
.: confidential(+) [git@gin.g-node.org:/EL1000/rague-confidential.git (git)]
[INFO   ] Configure additional publication dependency on "confidential"
.: origin(+) [git@gin.g-node.org:/EL1000/rague.git (git)]
[INFO   ] == Command exit (modification check follows) =====
create(ok): /Users/acristia/Documents/git-data/rague (dataset)
You can now make sure that your dataset has been properly pushed to GIN from the web interface (e.g. https://gin.g-node.org/EL1000/rague).
You may need to change the default branch to main. This can be done from your repository's web page, by going into Settings > Branches.
If you have created a confidential version too, the same step should be taken for it.
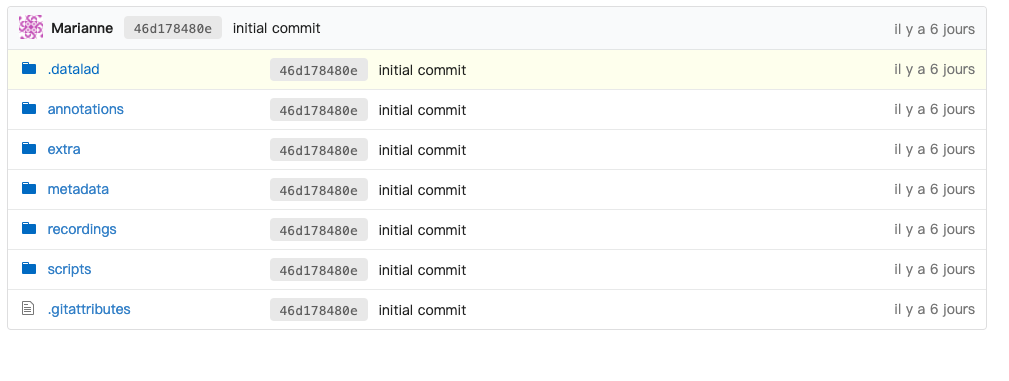
Your repository/ies should look like this:
Organizing raw data
Your dataset has been created, configured and linked to GIN. But for now, it has no contents. The next step is thus to add raw data to the dataset in the right place.
There are two possibilites:
- Some data are confidential and should only be accessible from
<your-dataset>-confidential - All data can be included in the main version of the dataset
In what follows, we'll provide the procedure for both steps.
Some of my data are more sensitive than others
Here is the rule: every file that is a descendant of a confidential folder will be restricted
to users that have read access to <your-dataset>-confidential; any other file will
be shared with all users who have read access to your dataset.
Here are a few examples:
Files that would be confidential
metadata/confidential/whatever.csvannotations/its/confidential/raw/something.itsannotations/its/confidential/converted/something.csvannotations/eaf/confidential/raw/some/annotation.eaf
Files that will not be
metadata/somefile.csvannotations/its/raw/something.csv
It is therefore crucial to organize your data in the right place depending on its level of sensitivity.
Metadata
The original metadata is likely to contain information that should be restricted to the confidential version of the dataset.
Therefore, all your original metadata should lie in metadata/confidential/original.
# cd to your dataset
cd <your-dataset>

# create an empty folder for the original metadata
mkdir -p metadata/confidential/original
LENA annotations
The first step is to make room for the .its.
# create an empty folder for the .its
mkdir -p annotations/its/confidential/raw
All your .its should be saved at the root of annotations/its/confidential/raw. Indeed, .its annotations contain sensitive information or other information that may be used to identify the participants (such as their date of birth).
Then, an anonymized version of the .its should be created. This is done with the ChildProject package:
child-project anonymize . --input-set its/confidential --output-set its
This may take some time.
Once the command has completed, anonymized .its files should be accessible from annotations/its/raw:
ls annotations/its/raw
123417-0008.its	123461-0713.its	123505-1620.its	123549-2417.its ...
Other data
- VTC annotations (.rttm files) should be moved to
annotations/vtc/raw - VCM annotations (.rttm files) should be moved to
annotations/vcm/raw - ALICE annotations (.txt files) should be moved to
annotations/alice/output/raw - Any other kind of annotation should be moved to
annotations/<location>/raw/ - Other files (documentation, etc.) should be moved to
extra/
You can create empty folders with mkdir -p, e.g. mkdir -p annotations/vtc/raw.
Save and publish
Once all your raw data have been correctly placed in the new dataset, you need to save the changes and publish them on GIN :
# save the changes locally
datalad save . -m "raw data"

# publish
datalad push
I want all my data to be equally accessible
Metadata
We suggest that you move your metadata to metadata/original:
# cd to your dataset
cd <your-dataset>

# create an empty folder for the original metadata
mkdir -p metadata/original
LENA annotations
The first step is to make room for the .its.
# create an empty folder for the .its
mkdir -p annotations/its/raw
All your .its should be saved at the root of annotations/its/raw.
Other data
- VTC annotations (.rttm files) should be moved to
annotations/vtc/raw - VCM annotations (.rttm files) should be moved to
annotations/vcm/raw - ALICE annotations (.txt files) should be moved to
annotations/alice/output/raw - Other files (documentation, etc.) should be moved to
extra/
You can create empty folders with mkdir -p, e.g. mkdir -p annotations/vtc/raw.
Save and publish
# save the changes locally
datalad save . -m "raw data"

# publish
datalad push
Importing the metadata
The next step is to generate metadata in ChildProject's format from the ITS and the original metadata.
There is no magic recipe for that! Each dataset is different, and will require some adaptations.
However, each existing dataset includes the script used to generate the metadata (in scripts/metadata.py), which you can
adapt to your own dataset.
We recommend that you copy an example from a dataset which original data look like yours, and save it to scripts/metadata.py.
Then you can make all necessary changes.
Below, we will comment an example drawn from the Winnipeg dataset, just to clarify what each part of the code does.
!/usr/bin/env python3

import pandas as pd
from EL1000.metadata import MetadataImporter

# This table is used to generate Socio Economic Status variable
# which is commensurable across all EL1000 datasets,
# from a metric -- here parental schooling -- that may be peculiar to this dataset.

ses_table = {
    'bhs': '1',
    'hs': '2',
    'sc': '3',
    'cd': '4',
    'ad': '5'
}

# the if block is here to prevent issues due to multiprocessing.
if __name__ == "__main__":

    # the importer accepts more options,
    # which are documented here: https://gin.g-node.org/EL1000/tools/src/master/EL1000/metadata.py#L47-L63
    importer = MetadataImporter(
        experiment = 'winnipeg', # id of your corpus
        metadata = 'metadata/confidential/original/winnipeg_metadata.csv' # path to the original metadata
    )

    # read the metadata in order to generate a dataframe of ITS files
    its = pd.read_csv(importer.metadata, dtype = {'child_id': str})

    # column names are standardized according to ChildProject's conventions
    # (see https://childproject.readthedocs.io/en/latest/format.html#metadata)
    its.columns = list(map(lambda s: s.lower(), its.columns))
    its.rename(columns = {
        'its': 'its_filename',
        'sex': 'child_sex',
        'language': 'languages'
    }, inplace = True)

    # original ses is converted to EL1000's standard ses,
    # using the conversion table at the top of the script.
    its['original_ses'] = its['ses']
    its['ses'] = its['ses'].astype(str).map(ses_table)

    # languages should be comma-separated
    its['languages'] = its['languages'].apply(lambda s: ','.join(s.split('_')))

    # importer.process generate children and recordings metadata from the dataframe of ITS files.
    children, recordings = importer.process(its)

    # clean-up children metadata with irrelevant fields before saving,
    # then save
    children.drop(columns = children.columns & {'its_filename', 'date_iso', 'age', 'aclew_id'}, inplace = True)
    children.to_csv('metadata/children.csv')

    # save the recordings metadata
    recordings.set_index('recording_filename', inplace = True)
    recordings.to_csv('metadata/recordings.csv')
Once you have adapted the script to your case, save it and run it from the root of your dataset:
python scripts/metadata.py
Now, you can make sure that your dataset pass the tests:
child-project validate . --ignore-recordings
IF the validation passes, you can save it and publish it to GIN:
# save the changes locally
datalad save . -m "metadata"

# publish
datalad push
Importing annotations
(WIP)